Connection failed with error 651 is common to Windows users, the error is popular on Windows 7 through Windows 10. It normally shows up when you’re trying to connect your PC to the internet. When the error 651 is received it means that your attempt to connect to the internet has failed or if you’re already connected, it means the connection has stopped or has been terminated. Whether you’re using a cable or wireless, you might end up with internet error 651 on Windows.
What Are The Causes Of Internet Error 651?
- Corrupt Windows Registry Database.
- Wrong Ip Settings or when they’re damaged.
- Broken internet configuration.
- Firewall or antivirus software is blocking the connection.
- Presence of malware that can temper with connection settings.
- LAN is disabled.
- Missing system files especially respppoe.sys, or when these system files are corrupt.
- When there is a wrong broadband connection.
- Damaged system driver which can be caused by the presence of viruses on the system.
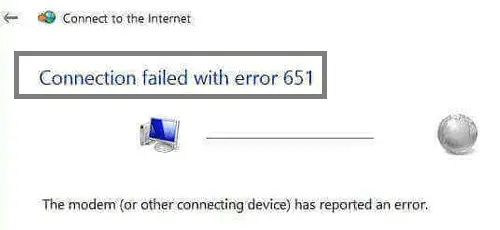
Connection Failed With Error 651
How to Fix Connection Failed with Error 651
Some Important Tips Before You Start Troubleshooting The Problem Of Internet Connection Error 651
- Close all applications and restart your computer: this will refresh your PC settings and can help you remove the error fast without any troubleshoot.
- Test your connection on another device: to ensure that it’s not a network problem, try and connect to the network with other devices. If things are working smoothly, it means the problem has to do with your device settings and that’s what you should concentrate during troubleshoot.
- Check all cables that connect your router to the PC to ensure there is no damage or leak.
- Install Windows updates: if you haven’t installed Windows updates for some time, you need to check and add all missing updates. You can do this by going to Settings, Update and security, check for updates.
- You should temporarily disable Firewall or thirty antivirus software: Firewall and antivirus software are known to block networks and cause errors, you should temporarily disable them and test the connection before going into troubleshooting the problem, disable any other antivirus software you’re using also.
Fix 1: Power cycle your modem or router
This will refresh your network settings and might help you fix the problem. Here is how to do this:
- Shutdown your PC and switch off the router as well by removing the power cable.
- Disconnect every cable that connects your router and modem.
- You then connect them back again and restart your PC.
Fix 2: Boot with safe mode
- You should restart your computer and then enter safe mode by pressing the applicable function key for your PC. In most PCs, it’s F12, F11, and so on.
- When you log in safe mode, you should open Run by pressing Windows + R keys.
- You type ‘MSConfig’ in the dialogue box.
- Click ok or hit enter from your keyboard.
- On the Windows that opens, you should click the ‘Boot Tab’ which is at the top.
- From the Boot options, you should right-click on ‘Safe boot’.
- Under ‘Options’, you check the box that’s next to ‘Network’.
- Restart your device and then check to see whether the connection failed with error 651 is gone. If not move on to the next fix.
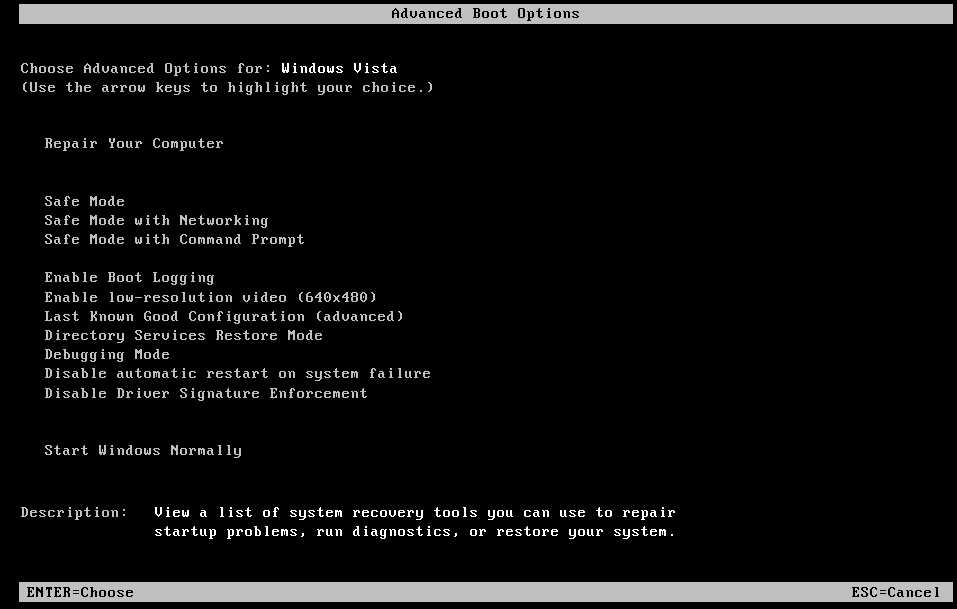
Boot on Safe Mode
Fix 3: Disabling all start-up services.
It’s possible some startup services are interfering with your connection settings, what you need to do is to disable them all. If the error is fixed, you’ll need to start the serviced one-by-one until you find the one that’s causing the problem, and then disable it permanently or at least change your settings in such a way that the service doesn’t cause any problem to your network connection. Here is how to execute this:
- Open the Run dialogue as you did in the previous step.
- Type ‘MSConfig’ in the box and press enter or click OK.
- Click on the Boot tab.
- Uncheck the Safe mode box.
- Click on the General tab and locate ‘Selective Startup’.
- Clear the selections by unchecking the features.
- Click on ‘services feature’, click to ‘disable all buttons’.
- Next, you head over to the ‘Startup tab’ and disable all the items on the list.
- Restart your windows and open Run dialogue again and then type ‘MSConfig’ as you did in earlier steps.
- Click the ‘Services’ Tab.
- From the options, click on ‘Hide all Microsoft services feature’.
- Click Ok, and restart your PC.
- Check for the problem if it’s gone and if not, you need to open Run and execute the ‘MSConfig’ command again.
- Go to the ‘General’ tab and click ‘Normal Startup Feature’.
- Restart your Windows 10 device and check if the error is gone.
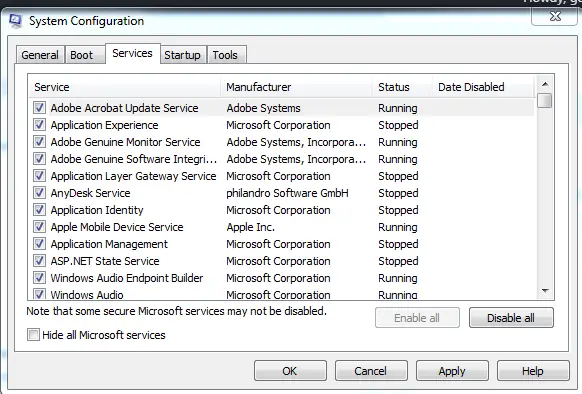
Disabling all start up services.
Fix 4: Fix raspppoe.sys file
As mentioned in the causes, rasppoe.sys can lead to this error, that’s why we need to address it as well. follow these steps to fix the rasppoe.sys file:
- When Windows 10 starts, click on the ‘My Computer’ icon.
- Double click on C:/drive or whatever name you gave your system drive.
- Double click to open the ‘Windows Folder’.
- Locate the folder named ‘System 32’ in the list of folders.
- And inside the ‘System 32’, you should locate the ‘Drivers folder’ and open it as well.
- Inside the ‘Drivers’ Folder, you should locate the file named ‘rasppoe.sys’.
- You’ll need to remove this file from the folder and download another one online, but you shouldn’t delete the current one permanently, you should ‘cut’ and save on another location on your PC. When you remove the ‘rasppoe.sys’ from the folder, you need to download a new ‘rasppoe.sys’ file online. Just search on Google or head over to Microsoft’s official website to download it. Once you download it, unzip and then copy and paste the new ‘resppoe.sys’ file in the ‘Drivers’ folder and restart your computer.
- If the problem connection failed with error 651 is due to corrupt ‘rasppoe.sys’. It will now be fixed since you downloaded a new file that’s clean. And if the error isn’t gone, it means nothing is wrong with your old ‘rasppoe.sys’ file. You can now go back delete the new one you just added and replace the old one which I already told you to save on other locations on your PC.
Fix 5: Run Network troubleshooter
The next thing you want to do now is to run the network troubleshooter, the tool is capable of checking your network settings and identify the cause of connection failed with error 651 on your PC. Here are the steps to do this:
- Go to the control panel on your PC, you can see this option by right-clicking on Start and then click on ‘Control panel’ and for old windows versions, just click ‘Start’ and you’ll see ‘Control Panel’ from the list of options.
- When the Control Panel window opens, you should type ‘Troubleshoot’ in the search box at the top.
- You’ll see the option ‘Troubleshooting’, all troubleshooting tools will now be listed when you click on this option.
- You should run these troubleshooting tools: Internet connections – Incoming connections and Network Adapter.
- If there are problems, you’ll receive a message displaying the problem found and whether it has been fixed or not, and if action is needed from your part you’ll be told what to do next.
- You should now restart your PC and check if the error is gone.
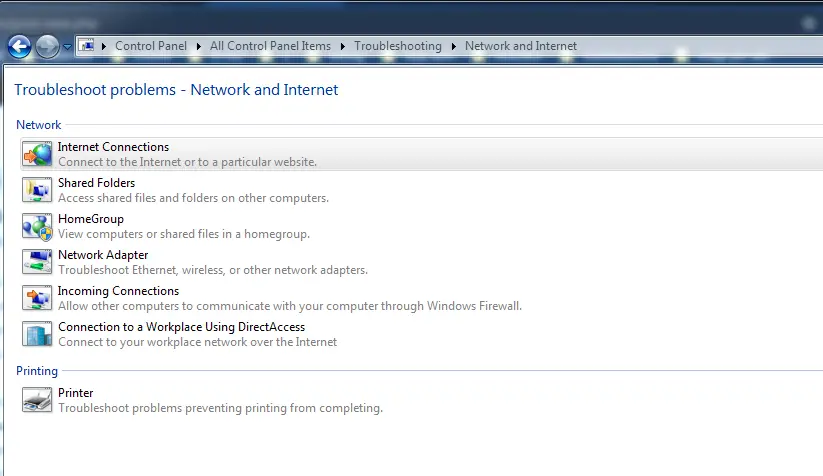
Run Network troubleshooter
Fix 6: Reset TCP/IP settings
- Open ‘Command Prompt’, for Windows 8 and 10, you can see the option by right-clicking from Start and you’ll see ‘Command Prompt’ in the context menu. Right-click on Command Prompt and select ‘Run as Administrator’. For the older windows version just search for ‘command prompt’ in windows search, you can do this also for Windows 10 and 8.
- When Command Prompt opens, you should type netsh int ip reset reset.log and hit enter to run the command.
- When done, you should now restart your Pc and check if the error is gone.
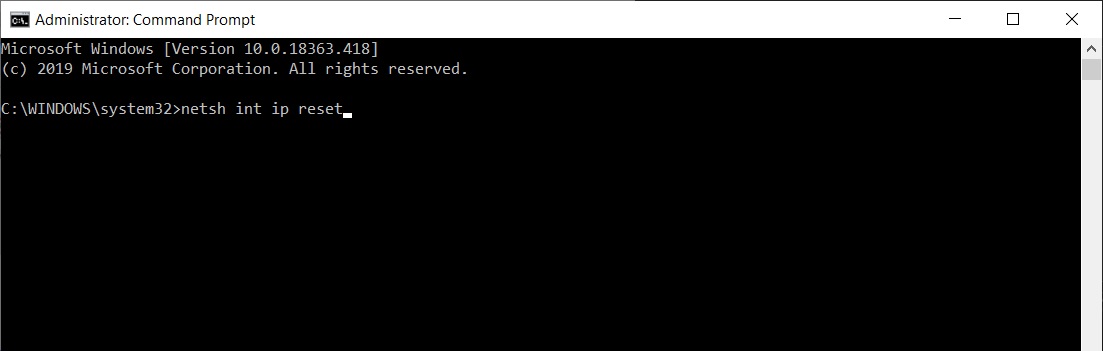
Reset You TCP-IP to default
Fix 7: Update Network drivers
Updating network drivers can also help fix the problem, he is how to do that:
- Whatever windows version you’re using, just type ‘Device Manager’ in Windows search.
- When the device manager shows up, you should click to open it.
- Find your network adapter driver on the list.
- Right-click and from the context menu you’ll see the option ‘Update driver’.
- Windows will check for updates if available and install them, if you’re having problems downloading the updates automatically, you can go to the manufacturer’s website and download the updates manually, then you unzip the folder and install the updates on your PC.
- After updates are successfully installed, you should restart your computer.
Fix 8: Disable Auto-tuning
Auto-tuning is designed to enhance the performance of applications that rely on TCP. But is some cases it turns out to be harmful to your PC and that’s why we need to temporarily disable it and see if we can get rid of the internet connection error 651 on your computer. Here is how to disable it:
- Open the command prompt as you did in the previous steps.
- Type and run this command:
Netsh interface TCP set global autotuning=disabled
- You should hit enter for the command to run, this command will disable Autotuning on your PC.
- Restart your Pc and test your connection to see if it’s working.
Read also:
Fix 9: Fix your registry database
Corrupt registry files can mess up with a lot of processes on your PC, you can fix the registry files by clearing junk registry keys. Editing your registry manually places you at high risk of making mistakes and therefore the best way to clean the registry is by using registry cleaners. You can use a simple and free tool like CCleaner to clean your registry. Download the tool and install it on your pc, once you run it, it will scan for potential errors in the registry and you can choose to fix them automatically.
Fix 10: Create New PPPoE connection
When PPPoE is not well configured it sometimes causes error 651 when trying to connect to the internet, so what you’ll do now is to delete the current PPPoE and set up a new connection. Here is how to do that:
- Open the control panel, whatever Windows version you’re using, just search for ‘Control Panel’ and it will show up. Click to open it.
- Click ‘Network and Internet’ and select view status and task.
- Then you select ‘Set up a new connection or network’.
- Select to ‘Connect to the internet’ and click ‘Next’ where you create a new PPPoE connection.
- Select ‘Broadband (PPPoE).
- Add a name for the connection, then you add username, password, and IPS details.
- Click the connect button.
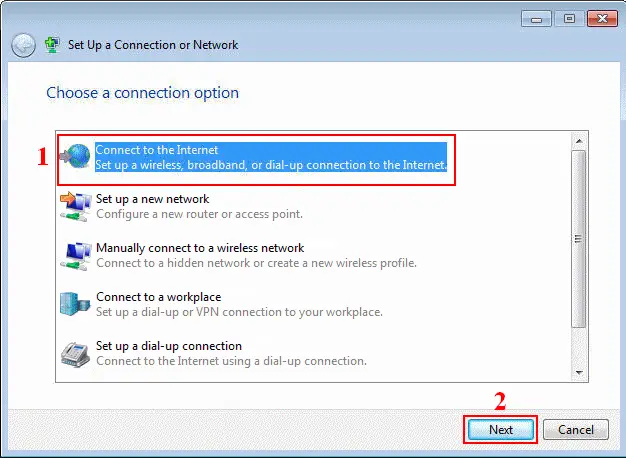
New PPPOE Connection
Fix 11: Reinstall LAN Card drivers
This is applicable if you’re using a modem, you should uninstall it from the desktop or whatever location you place it and then install again.
If the problem is related to the LAN card driver, you’ll take care of the problem. Test the connection and see if the problem is gone.
Fix 12: Create a new dialer and reboot the ADSL modem router
This is also for modem users and it’s a simple fix that has worked for many users facing the problem of error 651 the modem has reported an error. What you should do here is to delete the old dialer and then create another one. After that test, the network again to see if the error is gone.
Fix 13: Use network repair tools
And finally, if things aren’t still working, you can use network repair tools, these tools will search for potential network problems on your PC and adjust them to the right settings. Just search for ‘connection error 651′ on google and you’ll get reviews from some of the best tools that can help you fix the problem.
Conclusions
Above we explained all our 13 suggestions to troubleshoot and fix “connection failed with error 651”. Let’s hope that you fix your issue with one of those recommendations.