The error “DISM Error 1009: The Configuration Registry Database Is Corrupt” isn’t new for Windows users. It can show up when you’re trying to open programs on your PC, but in this post, we’re addressing this error concerning DISM tool on your PC. You already know that DISM help diagnoses various problems on your PC, but if it turns out that the tool isn’t working and is showing errors such as the “DISM Error 1009”. You probably won’t be able to run some troubleshoots on your Windows PC.
What Is DISM Error 1009: The Configuration Registry Database Is Corrupt?
It’s an error that shows up when you attempt to repair Windows image with a corrupt registry. It mostly occurs when you run these two commands:
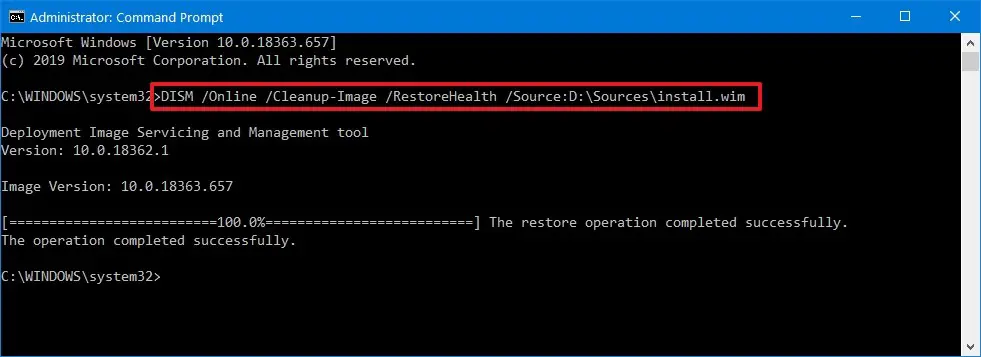
Dism /Online /Cleanup-Image /Restorehealth.
Dism /Online /Cleanup-image /Restorehealth /source:wim:X:\sources\install.wim:1
/LimitAccess.
Also, it can show up when running the DISM command in WinRE (Windows Recovery Environment). The popular command that causes the problem is: “Dism.exe /Image:X:\ /Cleanup-Image /Restorehealth”.
The second scenario that shows up this error is when the Windows update failed on Windows 10. Generally, when you Look at the error code, we can conclude that it’s an error caused by corrupt registry files and they have to be fixed to solve the problem.

What Is DISM Error 1009
How To Fix DISM Error 1009
Before solving the error, you need to have your Windows Installation Media. That’s either a DVD or USB. If you don’t have access to it, then you need to download online or use Microsoft’s Media creation tool.
Fix 1: Remove Windows Update
If you started experiencing the problem after installing updates, you need to remove these updates from your PC. Here is how to do that from your installation media:
- Boot the PC using your Installation media.
- On the boot screen, you should open Command Prompt by pressing Shift + F10, or alternatively, you can click on “Next” and then select Repair My Computer > Troubleshoot > Command Prompt.
- Type this command when the Command Prompt opens:
wmic logicaldisk get name
- Hit enter to run the command, all the drives on your PC will be listed with this command.
- Next, you type “dir C:” in the command prompt to locate the drive that has the “Windows” folder. It’s the drive that has Windows installation. You should replace the “C” with the alphabet of your drive or any other name you gave to your drive where windows are installed. It can be the letter D: or F:, just replace with the appropriate letter.
- Once you trace the drive that contains the Windows folder you then run C: and hit enter. That’s if the name of your drive is C:/. Whatever the name of the drive is, you should type the name in the command prompt and hit enter.
- Next, you should create a scratch folder on your drive by typing the command
mkdir C:\Scratch
- You now run this command:
DISM /Image:C:\ /ScratchDir:C:\Scratch /Cleanup-Image /RevertPendingActions
to roll back the updates you have installed. Always remember to replace “C:” with the name of your drive.
- After executing the command above, you’ll be receiving the message:
"Reverting pending actions from the image….

The operation was completed.  Any revert of pending actions will be attempted after the reboot

The operation completed successfully".

everting pending actions from the image….
- After receiving the above message, you then close Command Prompt and restart your PC.
If Windows can boot successfully, you now continue working with your PC. If on the other hand it fails to boot and is attempting to install the updates again, you should execute these steps:
- Restart your PC and boot using the installation media as you did previously.
- Launch the command prompt following the steps above.
- You now run the following three commands in order and don’t forget to replace “C:” with your drive name:
del C:\Windows\SoftwareDistribution

del C:\Windows\WinSxS\cleanup.xml

del C:\Windows\WinSxS\pending.xml
- Hit enter after each command to run, and when successfully done, you should restart your PC.
- If the system still fails to boot again, you should boot again and open the command prompt, then run the following set of commands:
chkdsk /f C:

sfc /scannow /offbootdir=C:\ /offwindir=C:\windows

dism /image:C:\ /cleanup-image /restorehealth
- Replace “C:” with your drive as in the previous steps.
- You now restart your PC, and hopefully, you’ll be able to get rid of DISM Error 1009 “The configuration registry database is corrupt”, and if not, you should proceed to the next fix.
Fix 2: Registry restore from backup
The next troubleshoot you need to try now is restoring the Windows registry using the “RegBack” folder and here is how to execute the steps:
- Boot Windows with installation media like you did previously, open the command prompt, and run the command “wmic logicaldisk get name” to list down your drives and then locate the Windows folder from the drive you’re using. Note that you’re running this command if you don’t know the name of the drive windows is installed. If you already know you just need to run “C:” to open the Windows folder on the drive (keeping in mind to replace “C:” with your drive name.
- You now run these three commands one by one:
cd \windows\system32\config
md Backup
copy *.* Backup

md Backup
- You then navigate to the RegBack folder by running the command “cd RegBack” in the command prompt.
- There would be two scenarios: first, there would be a list of files, and their sizes will be displayed in bytes, you might notice files that have zero bytes (0). This shows that such registry files are either corrupt or empty and that should be the cause of the problem. You should now stop here because the best thing to do here is to restore Windows which we’ll outline in the next fix.
- The second scenario is that when none of the files displayed have zero bytes (0). In this case, you need to run this command “copy *.* ..” executing this command will copy registry files from ‘Windows\System32\Config\RegBack’ Folder to “Windows\System32\Config\” Folder.
- If you’re prompted, you should press the letter “A” on your keyboard to overwrite the files in the destination folder.
- Once the files have finished copying, you now type “Exit” and press enter to exit the command prompt Windows.
- Restart your PC and see if things are working.
- If you’re not able to boot successfully, you should boot again with WinRE. Open the command prompt just like in the previous steps during boot and run these commands one by one:
chkdsk /f C:
sfc /scannow /offbootdir=C:\ /offwindir=C:\windows
dism /image:C:\ /cleanup-image /restorehealth
- Hopefully, you might solve the problem when windows restart.
Fix 3: Restore Windows to a previous working version
As mentioned in the fix above, if you received a Zero (0) value in some of the files listed earlier. You need to restore windows because it shows that the registry is seriously damaged. Here is how to do that:
- You first boot your PC using Installation media as you did in the previous methods.
- Select the option “Repair Your Computer” and then “Troubleshoot”.
- The next option to choose on the screen is “Advanced Options” and then choose “System Restore”, or in some PC’s you’ll see the option “Go back to a previous build”.
- You’ll now select your operating system in the next screen that shows up.
- Click next when you’re at the System Restore Wizard.
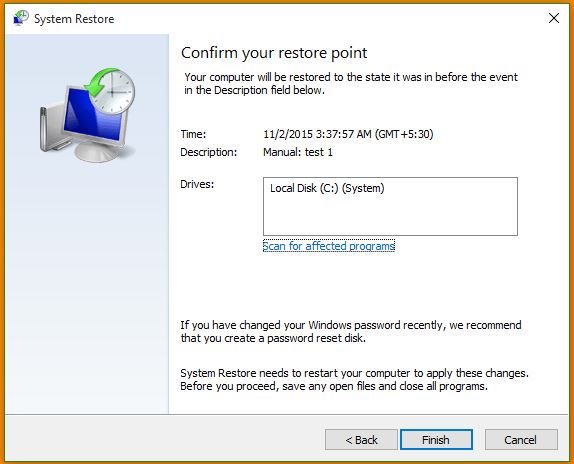
- You then select the restore point, you need to select a date when your system was working smoothly.
- Click “Next” to start the system restore process. When finished you’ll be prompted to restart your PC, or in most cases, it will restart automatically.
- You now check for the error to see if it’s gone or not.

system restore windows 10
Fix 4: Repair Windows
If “DISM Error 1009 The configuration registry database is corrupt” couldn’t be fixed with system restore, you now repair windows. This is pretty simple, you should boot your computer using Installation media, as usual. Then you select the option Repair your computer, and you’ll be guided through the process. It will take some time because Windows will now compare the original files on your installation media to the current files on the PC and then automatically repair the files affected.
So far these are the most effective solutions for DISM Error 1009 “The configuration registry database is corrupt”. Let us know the troubleshoot that solved the error for you even if it’s not listed here so that our readers can learn more about this error.

